Understanding the best RV roof sealant for your camper is critical when it’s time to patch or reseal worn or damaged areas. Inspecting your roof before and after each trip and setting aside time at least once a year to reseal as needed is smart. So is washing and conditioning the roof annually to prevent oxidation and dirt buildup. But you’ll need to understand roof types, the difference between coating and sealants, and why the best camper roof sealant for your RV depends on the roof’s construction. Let’s dive in.
Overview of Common RV Roof Types
These are the most popular roof material types, along with some advantages of each:
| Rubber (EPDM and TPO) | PVC | Fiberglass | Aluminum |
| Lightweight | More resistant to scratches, tears, and UV degradation | Less maintenance | Less maintenance |
| Easy to repair/replace (compared to others) | No streaking due to decreased dirt retention | Resistant to weather-related damage | Non-toxic and eco-friendly |
| Long lifespan (~15-30 years) | Anti-microbial to resist mold and mildew | Good lifespan (~10-20 years) | Relatively durable |
Technician Tip: Consult your manufacturer or owner’s manual to confirm which RV roof type your unit has.
What Is the Difference Between RV Roof Coating and Sealant?
Though the terms are sometimes used interchangeably, a coating is used to seal (or reseal) an entire RV roof, while sealants are used to reseal roof edges or patch smaller damaged or worn areas.
The distinction matters. If you have a small cracked seam or failed seal around a vent or antenna, you need a sealant. If your entire roof membrane is chalking, brittle, or showing widespread UV degradation, a full RV roof coating is the right tool.
Self-Leveling vs Non-Sag Roof Sealant
Self-leveling lap sealants are preferred for horizontal applications — around roof vents, antennas, and skylights. For RV roof seam sealer work on towables and motorhomes, a self-leveling sealant applied over the seam line is the standard professional approach: it flows into gaps, levels under its own weight, and cures to a flexible, waterproof bead.
Non-sag sealants serve a similar purpose on transition molding and vertical applications where a self-leveling product would run.
Using a product incompatible with your roof material, the application type (vertical vs horizontal), or the extent of the damage, can shorten the repair’s lifespan or render it entirely ineffective. When in doubt, a certified technician can assess what your roof actually needs.
Picks for the Best Sealant (& Coatings) for RV Roofs
Our list of the best RV roof sealant products includes at least one option for each RV roof type. If you don’t already have one, pick up a caulking gun for easy roof sealant application.
Best RV Rubber Roof Sealant (EPDM and TPO): Dicor Lap Sealants

EPDM and TPO rubber roofs are the most common roof materials in travel trailers, fifth wheels, and motorhomes. They require a rubber roof sealant formulated to bond to flexible membrane surfaces without causing blistering or delamination. The right EPDM or TPO roof sealant must be compatible with the membrane chemistry, not just waterproof.
Dicor lap sealants are our top choice for RVs with EPDM, TPO, and PVC rubber roofs. With various colors, you can find your desired choice for resealing around roof vents, vent pipes, and aftermarket roof-mounted accessories. Their self-leveling options are excellent for most horizontal applications, but non-sag products are excellent for raised areas, such as crank-style antennas, where you need to build up a bead to provide complete coverage.
These RV roof sealants are UV-stabilized to reduce deterioration and discoloration with prolonged sun exposure. They also use a HAPS-free formula (HAPS = hazardous air pollutants), making them cleaner and safer to use on your RV.
Technician Tip: Whether self-leveling or non-sag, Dicor sealants are extremely consistent and last long when applied according to the instructions. Regular inspection and touch-ups of Dicor lap sealant every 6 months, and treating the roof membrane and seals with a recommended rubber roof cleaner, also at least once a year, per the manufacturer, will prevent costly water damage to your RV roof.
Best RV Rubber Roof Coating: Dicor Rubber Roof Coating System

If you need a solution for resealing an entire roof, Dicor’s rubber roof coating system is the best RV roof coating for rubber roof and EPDM membranes. It’s one of the most recommended motorhome rubber roof coatings because larger motorhome roof surfaces benefit from the system’s full-coverage application.
On average, an 8’ x 30’ RV roof would require 4 gallons for a complete reseal, as Dicor recommends applying a minimum of 2 coats at a coverage rate of 1 gallon per 125 square feet of roof surface.
Technician Tip: This multi-stage system must be applied properly, but it offers an affordable option for many roofs that need major repairs. Coatings are meant to protect the membrane from the elements, not to replace proper caulking. Major leaks still require removing, cleaning, and resealing the lap sealant around vents, edges, and screws.
Best Sealant for Fiberglass RV Roof: Geocel ProFlex RV Sealant, Clear

This clear Geocel sealant works great for patching or resealing smaller areas on a fiberglass RV roof. It’s a CARB-compliant (CARB = California Air Resources Board) formula that offers better adhesion, even when damp, and greater elasticity than silicone sealants.
This clear formula can be painted over, making it easy to match your RV’s exterior color after completing the repair. The formula also bonds in damp seams and joints, helping you achieve a watertight seal without waiting for a perfectly dry day.
Technician Tip: Geocel goes on accurately and finishes clean. It lasts and lasts on properly prepared surfaces. It sets up quickly as well, so work in small sections.
Best Fiberglass RV Roof Coating: Dicor Fiberglass RV Roof Coating

This one-gallon Dicor roof coating is great for resealing fiberglass RV roofs. The bright white finish is designed to improve your RV’s reflectivity, thereby keeping the interior temperature cooler. Once dry, the flexible roof coating resists mold and mildew.
One gallon is designed to cover approximately 350 square feet of RV roof area. Dicor recommends a minimum of two coats to optimize the performance of this roof coating. The first coat must be dry before applying the second coat, and the roof will need at least 24 hours to fully cure.
Technician Tip: Unlike rubber membranes, fiberglass must be carefully prepped, and only products engineered specifically for it should be used to ensure lasting results.
Best Aluminum RV Roof Sealant: AP Products Sikasil N-Plus
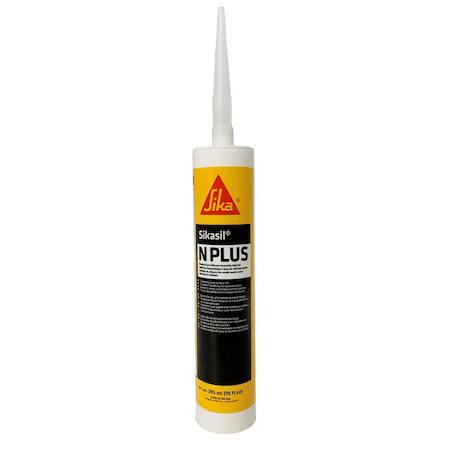
Airstream is one of the most iconic aluminum RVs, so we turned to them for a recommendation on aluminum RV roof sealant. Sikasil was the answer. This quick-curing silicone sealant comes in multiple colors and bonds to aluminum substrates without a primer. It’s used in RV production because of its long service life, enhanced adhesion, fast curing, and high early green strength.
Technician Tip: Color alone is not Sika’s only choice. They have a broad selection of products formulated for specific applications, so be sure you have received the correct type, not just the correct color. Sealing aluminum rooftops is challenging, and inferior products may fail in as few as 30 days.
Check the color options:
Best Aluminum RV Roof Coating: Dicor Metal Roof RV Coating

Dicor’s metal roof RV coating works well for resealing the entire roof of an aluminum RV. It’s an elastomeric coating that forms a rubber barrier on any metal surface, including aluminum and steel, or on a previously coated RV roof. It must be used after applying Coating-Ready Cover Tape to the roof’s surface.
Technician Tip: Unlike spot sealing an aluminum roof, where a silicone product is the right call, full aluminum roof resealing calls for this elastomeric system.
Best Self-Leveling RV Roof Sealant: Dicor Self-Leveling Lap Sealant

The Dicor family of products also ranks among the best self-leveling RV roof sealants. Their effectiveness, easy application, and range of available colors make them hard to beat.
Technician Tip: Dicor offers sealants formulated for a wide range of RV roofing materials, but compatibility varies by product. Always verify the specific sealant’s approved substrates and whether a primer is required before application.
Runner Up: Alpha Systems Self-Leveling Lap Sealant
Alpha Systems also makes a useful collection of self-leveling lap sealants. Like the Dicor products, they’re made for horizontal applications and are designed to block air and moisture intrusion while offering excellent weather resistance.
Best Sealant for RV Roof Seams: Heng’s LiquidRoofTape

With its easy brush application, Heng’s LiquidRoofTape is a smart choice for resealing RV roof seams. This liquid silicone solution is strengthened by microfibers and designed for use around roof vents, skylights, antennas, vent caps, and other factory-equipped or aftermarket roof-mounted accessories.
Best RV Roof Sealant Tape: Quick Roof Extreme Repair Tape

Use Quick Roof Extreme Repair Tape as a non-liquid RV roof sealant. Their tape products are compatible with EPDM, TPO, PVC, metal, fiberglass, vinyl, and even wood RV roof finishes. Plus, they are designed to withstand hardening, cracking, and shrinking over time.
Technician Tip: When using, follow all surface prep instructions closely. Avoid feeding from the roll. Lay it out along the seam first and cut it to length. Position it atop the seam, carefully peel away the backer in short sections, and press it into place over the seam. After working to the end of the seam, work the tape tightly into the seam using a clean, dry cloth. Never allow the sticky side of the tape to fold back on itself. If this happens, do not attempt to pull it apart and reuse it, as it will fail prematurely. Simply cut out the bad section, overlap where you left off, and continue. If gaps or puckers appear, rub them down as much as possible and apply a self-leveling lap sealant along that edge. Keep a roll in your toolkit for emergency patch repairs.
Runner Up: Dicor Seal-Tite Sealing Tape
Dicor’s Seal-Tite Sealing Tape effectively seals damaged RV roof sections and can also be used to repair sidewalls, holding tanks, and other affected areas.
Technician Tip: TThese offer a quick and reliable repair for seams, tears, and pin holes. With proper surface prep, all products can provide an affordable repair. The handy sizes and colors offered by Quick Roof and Dicor set them apart from others for field roof and awning repairs.
Signs You Need Professional Roof Repair

In certain situations, applying more roof sealant delays a problem rather than solving it. If you notice soft or spongy roof areas, water stains or bubbling on interior ceiling panels, delamination on interior walls, or visible gaps at transition molding along the roof edges, water has likely already moved past the sealant layer into the roof structure. If that happens, resealing won’t address the underlying damage.
Camping World’s certified technicians are trained to diagnose and repair all major RV roof types — EPDM, TPO, fiberglass, and aluminum — using material-specific products and methods. If you’re seeing any of the warning signs above, or you’re simply not comfortable assessing your roof yourself, start with a professional roof inspection.
FAQs About RV Roof Sealants
On average, one 10.3-ounce tube of RV roof sealant will cover just under 25 feet of RV roof edge, calculated for a bead with a quarter-inch width and depth. Let’s say you have a 30-foot RV roof that’s 8 feet wide, giving you a total of 76 feet of roof edge to seal. Using that same quarter-inch bead width and depth, you’d need a minimum of four 10.3-ounce tubes of sealant to reseal all roof edges.
Technician Tip: This calculation accounts for 5% wastage, which may be conservative. And as a product-based example, Dicor self-leveling sealant recommends a ⅜” to ½” bead width for effective sealing while ensuring proper adhesion and coverage of the joints or seams being treated. Use the recommended bead width for your compatible repair product to calculate how much sealant you’ll need.
FlexSeal should only be used on an RV roof in an emergency, but the Quick Roof Extreme Repair Tape is a better option. While FlexSeal can work well in areas that aren’t exposed to the sun, its lack of UV stabilization can cause it to crack and fail under prolonged sun exposure. Additionally, FlexSeal’s silicone products can leave a residue that inhibits the adhesion of other products, complicating future repairs.
Inspect the roof at least twice a year, and especially after storms or long trips. Look for cracked, shrunk, or lifting sealant around vents, seams, screw heads, and roof edges. The roof membrane itself can last 10 to 20 years with proper care and maintenance, such as using an RV cover to minimize exposure to UV, moisture, and dirt. The sealant that keeps water out does not. Most lap sealant needs spot touch-ups as soon as it fails, and many RVers reseal problem areas every 2 to 4 years, sooner in hot, sunny climates. Don’t wait for a calendar date. Reseal when the bead is dry, cracked, or pulling away.
Standard silicone sealants are not recommended for EPDM rubber roofs because silicone can leave a residue that prevents future adhesion, making subsequent repairs more difficult. EPDM roofs require sealants formulated to be compatible with rubber membranes. The one exception is aluminum RV roofs, where silicone is the industry standard. Always match the sealant chemistry to your roof material, and when in doubt, consult the product’s compatibility chart or your RV manufacturer.
Ready to take the next step in protecting your RV’s roof? Start with a thorough RV roof inspection.
Have questions about sealing or maintaining your roof? Good Sam Elite members can call the Good Sam Technical Support hotline at 844-649-4700 for questions and maintenance tips.
Have you used any of these sealants on your RV’s roof? Share your experience in the comments below.
The post Best RV Roof Sealant: A Complete Guide by Roof Type appeared first on Camping World Blog.