While properly maintaining the sealant on your RV’s roof is critical, every window, door, and seam connecting the walls and end caps to the roof also depends on sealant. This guide covers how to choose the right RV exterior sealant for vertical applications, where to find the seams that need it, and how to seal windows, doors, sidewall trim, and end caps.
Choosing a Sealant for Your RV’s Exterior
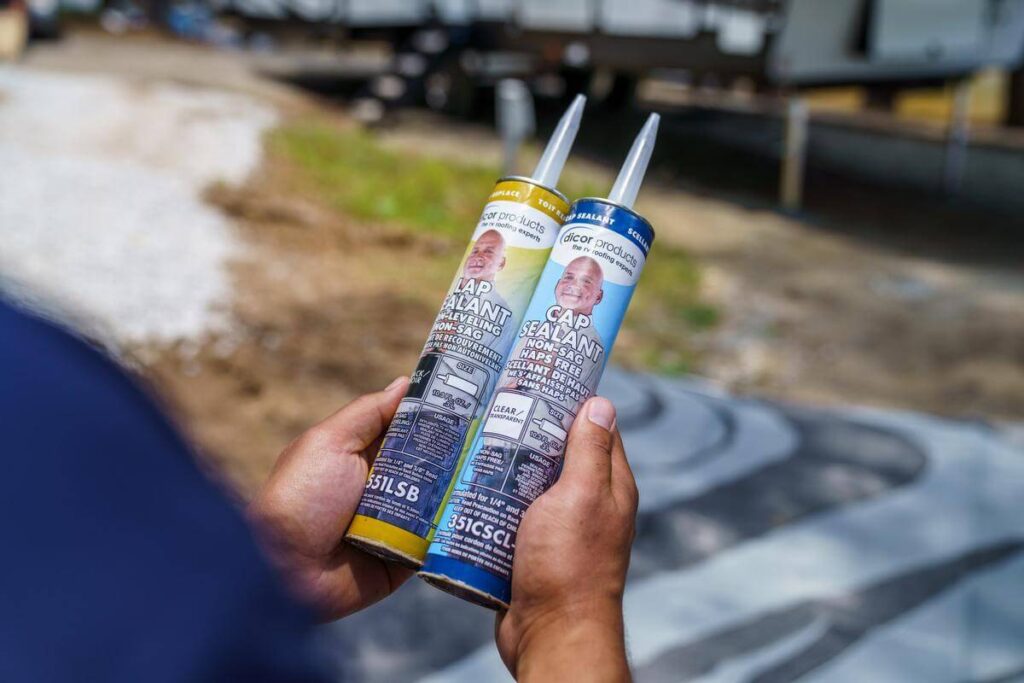
Choosing a product made for RV use and matched to the surface you’re sealing is critical. Residential and automotive materials often fail under the vibration, temperature swings, and moisture an RV sees.
Non-sag sealant for vertical surfaces. Whether you call it RV caulk or sealant, the best choice for sidewalls, end caps, and trim is a non-sag (non-leveling) formula that stays where you put it. Dicor and Alpha Systems both offer non-sag lap sealants.
Butyl tape behind flanges. Windows, doors, and many trim pieces are bedded in butyl tape, a sticky, non-hardening gasket that compresses between the flange and the wall. It’s often the primary seal, with a bead of sealant along the outside edge as backup.
Polymer sealant for metal, glass, and trim. Geocel’s ProFlex RV is a popular, paintable polymer sealant — not a silicone — designed for metal, glass, vinyl, and fiberglass. Geocel says not to use it on EPDM rubber roofing, which matters where an EPDM roof meets the sidewall; its separate ProFlex RV Hybrid formula adheres to EPDM.
Match what’s already there. Your owner’s manual likely advises touching up with the same sealant originally installed, since there’s no way to know whether two different brands will seal to each other. That matters most with silicone, which some manufacturers use on exterior seams and which many other sealants won’t bond to. Check your owner’s manual for your manufacturer’s recommended sealant type and/or brand.
Where Your RV’s Exterior Seams Are
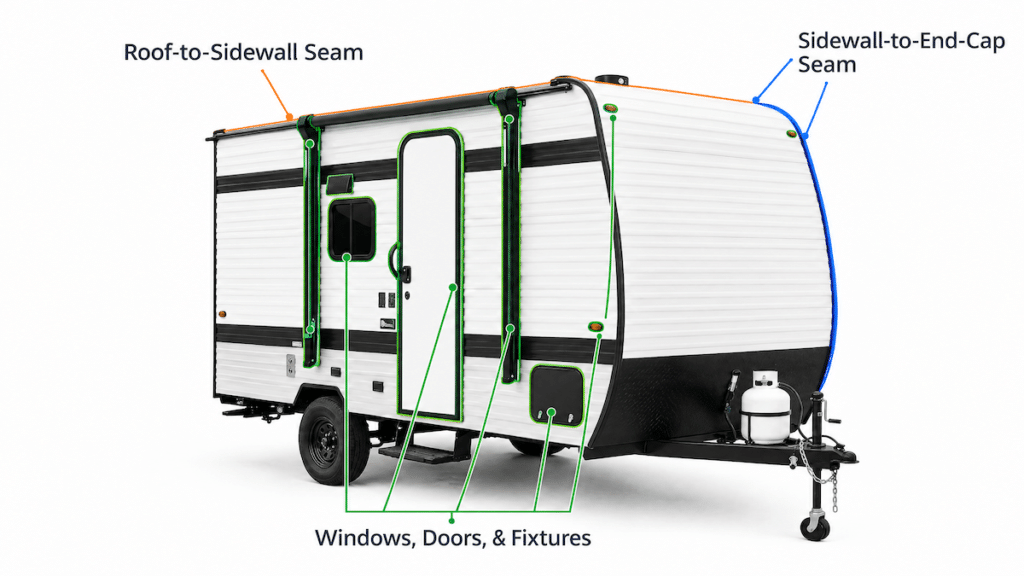
Water can get in anywhere two materials meet. On most RVs, the seams that matter most are the long joints where the sidewalls meet the roof and the end caps, followed by every window, door, and fixture mounted to the walls. The right seam sealant depends on which one you’re working on.
Roof-to-sidewall seams: Where the roof meets each sidewall, a roof edge molding runs the length of the RV. It’s screwed down over butyl tape and finished with sealant along its edges. Because this seam joins two different materials, the sealant has to suit both. Anything applied over an EPDM roof edge must be rated for EPDM, and the wall-side edge needs a non-sag formula that won’t run.
Sidewall-to-end-cap seams: The front and rear caps meet the sidewalls at the corners, usually under a corner molding bedded in butyl tape with a vinyl insert covering the screws. These seams flex as the RV travels. Many RV warranties expect owners to inspect the cap sealant before every trip or about every 90 days. Pay special attention to the top corners, where the cap seam meets the roof edge.
Windows, doors, and wall fixtures: This includes every window and door flange, exterior lights and speakers, compartment doors, power inlets, and awning and ladder mounts.
Before you seal any seam, remove loose or failed sealant without scratching the finish, clean the area, and let it dry. Avoid pressure washing, which can compromise the sealant.
Two areas need different care:
Slide-outs: Slide-out rooms seal with rubber seals that require periodic inspection and lubrication. Missed seal and sealant maintenance is the leading cause of slide-out leaks, and our RV maintenance checklist covers slide seal care.
Roof surface: Vents, skylights, antennas, and other seams on the roof itself need roof-specific products and techniques.
Learn how to reseal an RV roof.
How To Seal RV Windows
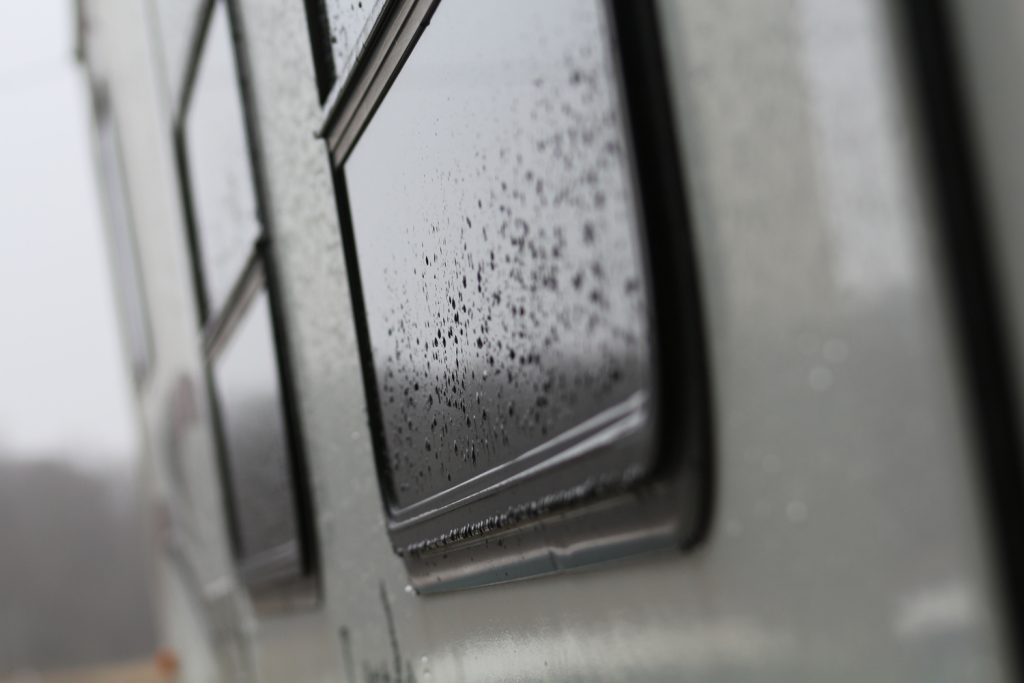
Sealing RV windows starts with knowing how they were installed. Some windows have a bead of silicone outside the flange, others have butyl tape behind it, and some have both. Over time, the sealant dries out, the tape behind the flange compresses, and frame screws can loosen due to vibration and temperature fluctuations.
If the outside sealant is cracked or pulling away but the window isn’t leaking, clean the area and run a new bead of compatible, non-sag sealant along the flange edge, following the same pattern as the original.
Some windows are cap-sealed along the top edge and partway down each side, while others are sealed all the way around. The small slots at the bottom of the window frame, known as weep holes, drain water out of the window track. Never seal over them, as they’re designed to let water out, not in.
If water is getting past the window, a surface bead won’t fix it. The lasting repair is to remove the window and replace the tape behind the flange with the same type used originally, either butyl or foam tape. For windows sealed with butyl tape, Dicor’s Seal-Tite Window Reseal Kit includes enough foamcore butyl tape for six to eight windows, plus two tubes of Dicor’s Clear Cap Sealant.
Our guide on how to replace RV doors and windows walks through the removal and reinstallation process, but because an improper installation can lead to water damage, it’s a job many owners leave to a certified technician.
How To Seal RV Entry and Compartment Doors

Doors seal in two ways. The door frame is typically bedded against the wall with butyl tape and sealant, and a rubber seal around the opening closes against the door itself.
The frame flange. Check the sealant around the outside of each door frame — the entry door, storage compartments, and access hatches — for cracks, gaps, or separation. Touch up small gaps with a compatible non-sag sealant. A compartment door frame that’s loose or leaking may need to be removed and rebedded, just like a window.
The rubber door seals. With the door open, look for tears, flattened sections, or spots that have pulled out of their channel. To check the contact, close the door on a strip of paper at several points around the opening; if the paper slides out easily, the seal isn’t making contact there. Replace damaged seals, and follow your RV manufacturer’s guidance on seal conditioning.
How To Seal Sidewall Trim, Fasteners, and End Caps
Many RV corner and trim moldings are aluminum strips screwed to the wall, with butyl or putty tape between them. A flexible vinyl insert, often called insert molding or a screw cover, snaps into a channel in the molding to hide the screw heads. If an insert is cracked or missing, remove any remnants of the old insert and press a new one into the channel, using a rubber mallet if needed.
A leaking molding is a bigger job. Sealant applied over the top rarely lasts, so the molding needs to come off. Remove the insert to reach the screws, take the molding off, and clean the wall. Seal the corner seam with corner seal tape such as Dicor’s Seal-Tite Corner Seal, then run a bead of butyl sealant along both sides of the molding and screw it back in place. Finish the edges with non-sag sealant.
If you’re wondering how to seal RV camper wall fasteners, start with every screw that passes through the exterior wall. Many are bedded in butyl tape or sealant at the factory. If a fastener has loosened, backed out, or shows rust staining, remove it, clean the hole, and reinstall it with fresh sealant or butyl. If the screw won’t tighten, moisture may have damaged the wood framing behind it, which is a job for a trained service technician.
End caps are joined to the sidewalls and roof with trim and sealant, and those seams flex as the RV travels. Reseal cracked or separating sealant with a non-sag product compatible with the end cap’s material.
Technician Tip: Some manufacturers call for replacing the cap sealant on a set schedule rather than waiting for it to fail, so check your owner’s manual.
When to Have a Technician Reseal Your RV

Touch-up resealing is a manageable DIY job, but a technician is the better choice if:
- A window, door, or molding is actively leaking and needs to be removed and rebedded
- Screws won’t tighten, or the wall feels soft around a fastener or seam
- An end cap is cracked or separating
- You can’t safely reach the upper seams on a tall RV
- Your warranty requires documented maintenance or manufacturer-approved materials
Camping World’s certified technicians can inspect and reseal your RV’s windows, doors, trim, and end caps.
For roof resealing costs, see our RV roof repair cost guide.
Frequently Asked Questions
Follow the schedule in your owner’s manual. Many RV warranties expect owners to inspect exterior sealants about every 90 days or before every trip. Check again after severe weather or any contact with branches. Butyl tape doesn’t last forever, either. The gaskets on doors, windows, and wall penetrations can dry out and need full replacement every 5 to 10 years, on average.
Clogged weep holes and failed butyl tape behind the flange are common culprits, but not the only ones. The seal between the glass and the frame can wear out, and resealing the flange won’t fix it. Condensation trapped inside can look like a leak, and spraying water directly into the weep holes during a wash can push water inside.
If water appears near the ceiling above a window, the leak may originate at the roof. See our RV roof leak repair guide.
For advice on picking the right sealant for roof work, see our best RV roof sealant guide.
Have you resealed your RV’s windows, doors, or trim? Share what worked for you in the comments below.
The post How To Seal RV Windows, Doors, Sidewalls & End Caps appeared first on Camping World Blog.